
Motion-activated lights sound like the cleanest “small upgrade” in a house. A wall switch comes out, a smarter one goes in, and suddenly the pantry or hallway stops being a place where lights get left on for hours.
Older houses have a way of turning that story sideways.
A specific pattern shows up in 1910s–1970s housing stock: a wall box containing only two insulated conductors and a ground. This often involves a shallow metal box, plaster rings, or brittle old cable. A no-neutral occupancy switch goes in and appears to behave—until the lamps change. In a 1926 bungalow pantry, a no-neutral approach looked fine on an incandescent bulb. Then a cheap LED multipack swap triggered the classic symptom family: a faint glow when “off” and occasional little flashes at night.
The switch didn’t suddenly “break.” The system changed, and the wiring constraint was always there. In this category, the neutral question isn’t a minor detail—it predicts whether this will be a one-and-done install or a slow-motion callback.
Also, “PIR sensor” often gets mixed up as a category. A PIR wall switch is one architecture; a ceiling sensor, fixture-integrated sensor, or smart bulb is another. The goal usually isn’t “a PIR detector must live in the wall box,” but rather “hands-free light that behaves like a normal light.” Neutral requirements track the architecture, not the marketing description.
Crucially: using ground as neutral, bootleg neutrals, and borrowed neutrals are not workarounds. They are hazards.
Box-Open Reality Check: Do You Actually Have a Neutral?
A lot of “no neutral” confusion starts with a reasonable assumption: the old toggle or dimmer had two wires on it, so the box must be missing a neutral.
That assumption often fails.
In a 1974 suburban colonial, a homeowner insisted there was no neutral because the old dimmer only used two leads. Opening the box changed the whole decision: a bundle of white conductors was capped in the back. The dimmer never needed it, but the neutral was there. The real constraint became box fill and space (bulky devices in a crowded box), not electrical impossibility. That discovery is common enough to treat as step zero: check the box first; shop second.
“Neutral present” in a wall box rarely looks like a single spare wire politely waiting. It’s usually a set of whites bundled together in the back with a wirenut, sometimes shoved behind the device. In newer wiring, it may be obvious. In older boxes, it can be a messy cluster—sometimes short, sometimes buried behind old cloth-insulated conductors, or hidden in a multi-gang where it’s hard to tell what belongs to which circuit without doing real circuit mapping.
“Neutral absent” in older homes often looks like a switch loop: power flows to the ceiling fixture, then a two-wire cable runs down to the switch and back. In that pattern, the neutral never came to the wall box. The two insulated conductors at the switch are hot-down and switched-hot-up (or some variation), plus a ground. This is extremely common in 1950s–1960s Midwest tract homes and older bungalows. It isn’t a “bad house”; it’s just a wiring architecture that predates neutral-hungry controls.
You can usually boil the box situation down to a branching question:
- If there is a neutral bundle in the box: Neutral-required wall switches—including many PIR and smart occupancy switches—become feasible. The install avoids the whole “powering through the load” compromise.
- If there is no neutral in the box (classic switch loop): The project is no longer “pick a different brand of wall switch.” It becomes “choose a different control architecture,” or plan a wiring change that actually brings a neutral to where the device needs it.
Old-work reality pushes back here. Shallow metal boxes, short conductors, brittle insulation, and crowded multi-gangs aren’t just annoyances—they’re failure predictors. If insulation cracks when conductors are moved, if the box is already at fill limit, or if splices are packed tight and hot, then “it fits if it’s crammed” is not a success state. It’s a near-future service call.
Maybe You Are Interested In

- Ceiling-mounted PIR occupancy sensor with dry-contact relay output
- 12/24VDC or 12/24VAC low-voltage supply
- COM, NO, and NC isolated relay contacts for EMS, HVAC, and building control inputs

- Low-voltage DC recessed ceiling-mounted microwave motion sensor switch
- 12 VDC / 24 VDC input with 10-30 VDC range
- 10A max work current with adjustable time delay, Lux threshold, and sensitivity
- Higher-load recessed ceiling-mounted microwave motion sensor switch
- 100-265 VAC line-voltage input, 10A model
- 5.8 GHz microwave sensing with adjustable time delay, Lux threshold, and sensitivity
- Recessed ceiling-mounted microwave motion sensor switch
- 100-265 VAC line-voltage input, 5A model
- 5.8 GHz microwave sensing with adjustable time delay, Lux threshold, and sensitivity
- Ceiling-mounted RZ037 PIR occupancy sensor dimmer for 220V power
- 3A maximum working current with 660W rated load
- LUX button controls light-sensor ON/OFF and user-set dimming brightness
- Ceiling-mounted RZ037 PIR occupancy sensor dimmer for 110V power
- 3A maximum working current with 330W rated load
- LUX button controls light-sensor ON/OFF and user-set dimming brightness

- Low-voltage DC ceiling-mounted microwave motion sensor switch
- 12 VDC / 24 VDC input with 10-30 VDC range
- 10A max work current with adjustable time delay, Lux threshold, and sensitivity
- Higher-load ceiling-mounted microwave motion sensor switch
- 100-265 VAC line-voltage input, 10A model
- 5.8 GHz microwave sensing with adjustable time delay, Lux threshold, and sensitivity
- Ceiling-mounted microwave motion sensor switch
- 100-265 VAC line-voltage input, 5A model
- 5.8 GHz microwave sensing with adjustable time delay, Lux threshold, and sensitivity

- Low-voltage DC recessed ceiling mount PIR motion sensor switch
- 12 VDC / 24 VDC input with 10-30 VDC range
- Max work current 10A with adjustable time delay, Lux threshold, and sensitivity

- Higher-load recessed ceiling mount PIR motion sensor switch
- 100-265 VAC line-voltage input, 10A model
- 360-degree detection with adjustable time delay, Lux threshold, and sensitivity
- Recessed ceiling mount PIR motion sensor switch
- 100-265 VAC line-voltage input, 5A model
- 360-degree detection with adjustable time delay, Lux threshold, and sensitivity

- Wireless switch and receiver kit for indoor ON/OFF lighting control
- 100-230VAC, 50/60Hz receiver with 5A rated current
- CR2032-powered wireless switch with 2.4GHz communication
- Occupancy (Auto-ON/Auto-OFF)
- 12–24V DC (10–30VDC), up to 10A
- 360° coverage, 8–12 m diameter
- Time delay 15 s–30 min
- Light sensor Off/15/25/35 Lux
- High/Low sensitivity
- Auto-ON/Auto-OFF occupancy mode
- 100–265V AC, 10A (neutral required)
- 360° coverage; 8–12 m detection diameter
- Time delay 15 s–30 min; Lux OFF/15/25/35; Sensitivity High/Low
- Auto-ON/Auto-OFF occupancy mode
- 100–265V AC, 5A (neutral required)
- 360° coverage; 8–12 m detection diameter
- Time delay 15 s–30 min; Lux OFF/15/25/35; Sensitivity High/Low

- 100V-230VAC
- Transmission Distance: up to 20m
- Wireless motion sensor
- Hardwired control
- Voltage: 2x AAA Batteries / 5V DC (Micro USB)
- Day/Night Mode
- Time delay: 15min, 30min, 1h(default), 2h
- EU plug power adapter

- UK plug power adapter
There are also clear stop points. Unknown circuits in an older panel, mixed circuits in a multi-gang, or any hint of multi-wire branch circuit/shared neutral complexity is where you should stop pretending it’s a simple device swap. This isn’t gatekeeping; it’s how nuisance trips, overheated neutrals, and confusing fault paths get created.
Why No-Neutral Sensor Switches Act Weird With LEDs (Mechanism, Not Myth)
No-neutral occupancy and motion sensor wall switches face a basic physics problem: the electronics in the switch need power, but there is no neutral conductor to complete a normal supply circuit. Many designs solve this by “sipping” a tiny amount of current through the load when the light is off. That current is small enough that an incandescent filament typically doesn’t glow.
But LED drivers are not filaments. Many LED lamps and retrofit trims respond visibly to tiny leakage currents.
That is why “it worked yesterday” stories cluster around bulb swaps. In the 1926 bungalow pantry scenario, the no-neutral switch behaved on an incandescent. A bargain A19 LED multipack went in—Costco-style “three-pack on sale”—and suddenly the light glowed faintly all night and sometimes flashed like a heartbeat. The switch didn’t get haunted; the LED driver just started acting as a visible meter for leakage current. This is why asking “is there a sensor that works with any LED?” is asking for something the category generally cannot promise.
The mechanism shows up in more than one symptom. In a kitchen remodel with multiple retrofit LED can trims, a no-neutral sensor turned on normally, then began cycling after warm-up: on for a second, off for several seconds, repeating. Swapping to a plain toggle made the symptom disappear. That’s the important diagnostic clue: the wiring wasn’t the ghost. The interaction between control electronics and driver behavior was the variable. Switching sensor brands often turns into churn because the underlying compromise (powering the device through the load) remains.
A symptom map helps stop the guessing. It’s not a universal decoder ring, but it’s reliable:
- Faint glow when “off”: Leakage current through the load + LED driver sensitivity.
- Rhythmic pulsing every few seconds when “off”: The driver is charging and discharging on tiny current; the switch is likely “sipping” power.
- Chatter (rapid on/off) or cycling after minutes: Minimum load edge cases, thermal/driver behavior, or electronics that don’t like the load profile.
- Sensor never fully “off”: Again, load sensitivity and the control’s method of powering itself.
This is where “universal LED compatible” marketing claims should set off skepticism. LEDs are not one thing. A19 bulbs, BR30 floods, retrofit can trims, and integrated fixtures all use different driver designs. Even within one brand, internal driver revisions happen. A system that behaves today can misbehave a year later when a single lamp gets replaced with “whatever was on sale.”
That doesn’t mean every no-neutral PIR wall switch is junk. It means no-neutral is a trade: you get convenience now in exchange for a narrower compatibility envelope and more future sensitivity. When choosing a Rayzeek PIR sensor wall switch, that trade needs to be clear: the label “PIR” doesn’t make the neutral constraint disappear.
The stability move is to choose an architecture that doesn’t rely on leakage current through the lamp driver—whenever possible.
Reliability-First Decision Ladder (Old-Work Friendly)
This approach beats product shopping: start with the most reliable architecture and move down to compromises, explicitly labeled.
Rung 1: Use a neutral-present location and a neutral-required switch (when the box actually has neutrals). If a wall box has a real neutral bundle, a neutral-required PIR or occupancy switch is the straightforward choice. This avoids the “sip through the load” mechanism and removes a major source of LED glow and flicker complaints. The constraint usually isn’t electrical, but physical: box depth, box fill, conductor condition, and whether the old wiring can be rearranged safely. In the 1974 example, the fix path became “make the box serviceable for a bulky device,” sometimes meaning a deeper box or a box extender rather than an exotic switch.
Rung 2: Move the sensing to the fixture or ceiling when the wall box is a switch loop. In switch-loop houses—power at the ceiling, two-wire down to the switch—the grown-up move is often to stop trying to make the wall box do something it was never wired to do. A ceiling-mounted occupancy sensor or a fixture-integrated sensor can be fed where neutrals already exist (at the fixture). That’s why a landlord in a 1929 duplex hallway ultimately chose a fixture-level solution: plaster-and-lath and short conductors in an old box made “pull a neutral” the expensive, dusty option. The wall switch could go back to being a simple, predictable disconnect.
This mental shift helps avoid bad work. If the real goal is auto-off in a hallway or pantry, you don’t lose anything by letting the sensor live at the ceiling. The only thing lost is the idea that the wall must look a certain way. The gain is predictability.
Rung 3: Pull a neutral (or rewire) when the wall-switch architecture is non-negotiable. Sometimes you really do want the control at the wall, and the walls are already open for a remodel. In that case, the reliable solution is to wire the location correctly. This is where local code enforcement and permit expectations matter. The correct approach varies by AHJ, scope (new work vs old work), and existing wiring method. But the bottom line is: if the switch’s installation sheet says “neutral required,” the wiring needs to meet that requirement. Doing it right may require permitted work.
A brief category reminder (because it derails purchases): PIR does not automatically mean “no neutral.” PIR is a sensing technology, not a wiring workaround. A Rayzeek PIR wall switch is still a wall switch, with the same wiring realities as other electronic controls. If a product is neutral-required, it’s neutral-required. If a product claims no-neutral operation, it’s operating inside the leakage-current and compatibility trade space described earlier.
Rung 4: Use a no-neutral wall switch only when it is explicitly designed for no-neutral operation and the load is known-stable. This is the narrow-case compromise. It can be acceptable in low-stakes areas (a closet, a pantry, a utility room) when the device is listed and explicitly rated for the wiring scenario, and when the actual LED lamps/trims are known to behave with that control. The moment the load becomes a moving target—future bulb swaps, mixed lamp brands, retrofit trims with touchy drivers—reliability drops. This isn’t a moral judgment—it’s an engineering constraint.
Rung 5: Choose a different “hands-free” solution when invasiveness is the real constraint. Sometimes the best outcome isn’t a wall switch at all: a plug-in sensor, a fixture with integrated sensing, or a smart lamp approach that doesn’t require changing old wiring in shallow boxes. It’s not as satisfying as a “normal switch,” but it can be safer and more stable than forcing electronics into a box that barely tolerated a toggle.
A final stop-sign rung belongs here: if the box contains mixed circuits, shared neutrals, or a multi-wire branch circuit situation you can’t confidently map, this is professional territory. A 1968 tri-level basement finish scenario is a good example: adding a modern control exposed sloppy neutral splicing and caused breaker trips until the circuit topology was corrected. The lesson isn’t that smart switches are bad, but that modern devices reveal old neutral mistakes faster.
What Should Be Avoided (No Soft Language Here)
Ground is not neutral. Borrowed neutrals are not clever. Bootleg neutrals are not “just for a switch.”
Looking For Motion-Activated Energy-Saving Solutions?
Contact us for complete PIR motion sensors, motion-activated energy-saving products, motion sensor switches, and Occupancy/Vacancy commercial solutions.
In a 1957 rambler bedroom multi-gang, a DIY install tried to power a sensor switch by landing the neutral on a ground screw in a metal box. It “worked” in the shallow sense that the device powered up. It also produced a tingle on the plate screw and nuisance GFCI trips elsewhere, because the return current paths were wrong and neutrals had been mixed across circuits. Unwinding that kind of work takes hours: mapping circuits, separating neutrals, restoring grounding, and making the box safe again. It’s not an online “hack.” It’s a liability grenade.
Bad advice usually sounds like: “There’s no neutral, so just tie into the ground,” or “borrow a neutral from the other switch in the multi-gang.” The failure modes are predictable: shock risk, unpredictable device behavior, nuisance trips that mask real faults, and overheated or loose neutral connections in crowded boxes. The fact that it might “work for years” is survivorship bias, not a safety argument.
The minimum acceptable alternatives are boring on purpose: keep a standard switch, move the sensor to the fixture/ceiling where neutrals exist, or wire the location correctly by pulling the right cable and following listing requirements. Those options preserve the future serviceability of the house and don’t make the next electrician’s job an archaeological dig.
If the only path to making a device power up is a code-violating connection, the correct answer is “wrong device or wrong location,” not “how do I hack this.”
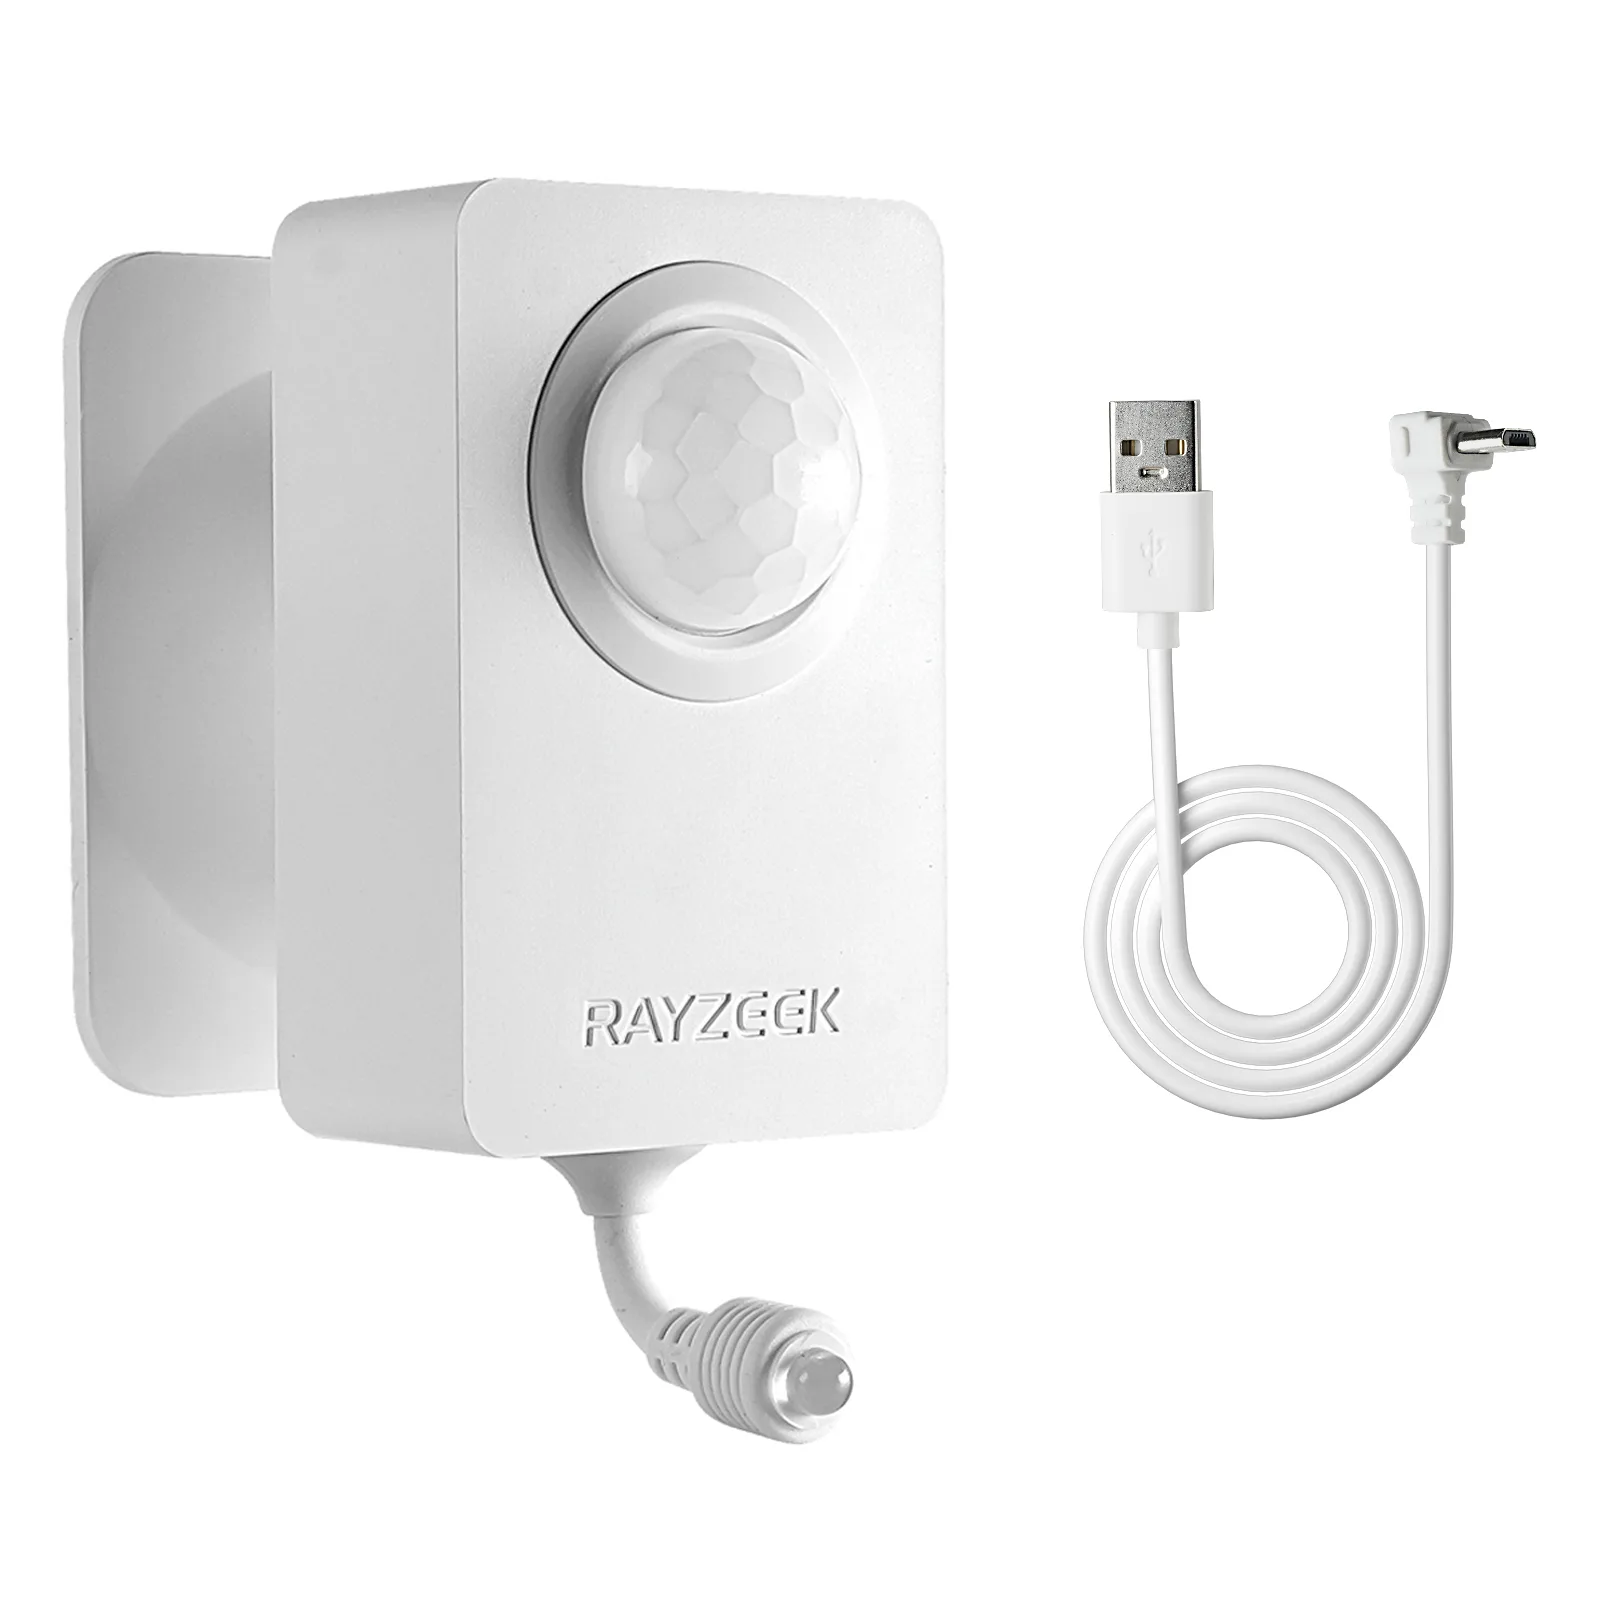
Where Rayzeek PIR Switches Fit (And What to Check on the Sheet)
Rayzeek PIR sensor switches live in the same reality as every other electronic wall control: they must match the wiring in the box and the behavior of the load. In older homes without a neutral conductor at the wall, that match determines whether the end result feels like a normal light switch or a weird science experiment.
Because product lines and specs change over time, the most useful guidance is not pretending a single model number is universally right. Instead, check the Rayzeek installation sheet and device labeling for these factors every time:
- Neutral requirement: If it says neutral required, treat it as a hard requirement. A switch loop without neutral is a redesign problem, not a “workaround” problem.
- Load type and ratings: Look for explicit notes on LED loads vs incandescent, and whether it’s rated for your specific lighting (A19 bulbs, integrated fixtures, retrofit trims).
- Minimum load: If a device has a minimum load requirement, treat it as a reliability constraint. Low-wattage LED loads can sit below that threshold even when “six cans” feels like a lot.
- Single-pole vs 3-way: Older hallways and stair circuits often involve 3-way switching. If the intended location is a multi-location circuit, the device must be listed and wired for that configuration.
- Listing context (UL/ETL): In the real world, listed devices matter because they come with defined wiring methods and constraints. Install the device per its instructions, not per forum creativity.
- Physical fit: If the box is shallow metal, conductors are short, or insulation is brittle cloth, a “bulky” device becomes a safety and longevity issue. A deeper box or alternative architecture may be the real solution.
The LED behavior section is where you should bring the mechanism back into the decision. If the planned Rayzeek PIR wall switch (or any no-neutral switch) relies on a no-neutral design approach, the symptom family described earlier is the risk envelope: glow, flicker, pulsing, or cycling—especially after lamp swaps or warm-up. The kitchen retrofit-trim cycling story is a useful reminder here: the “bad switch” narrative often evaporates when the load changes, because the driver is the unstable element.
Get Inspired by Rayzeek Motion Sensor Portfolios.
Doesn't find what you want? Don't worry. There are always alternate ways to solve your problems. Maybe one of our portfolios can help.
Treat “universal no-neutral” claims as sales language until the details prove otherwise. The rebuild is simple and unglamorous: confirm whether neutrals exist in the box, confirm the final lamp/trim plan, read the minimum load and LED notes, and choose the architecture that avoids relying on the lamp driver cooperating.
If the wiring reality can’t support the spec sheet requirements, the best Rayzeek choice may be “not at the wall box,” even if the original vision was a wall switch.
FAQ + A Practical Close
“The old switch had two wires. Does that mean there’s no neutral?” No. Two wires on the old device only means the old device didn’t use a neutral. In many 1970s-era boxes, neutrals are bundled in the back and capped. In many older switch-loop boxes, the neutral truly isn’t there. Verify what’s in the box, then make decisions based on that reality.
“It works with incandescent but not with LED. Is the sensor defective?” Not necessarily. That exact pattern is a clue: the control may be powering itself through the load, and the LED driver is sensitive enough to show leakage current as glow, pulsing, or flicker. The reliability-first ladder points to more stable outcomes: use a neutral-present location, move the sensor to the fixture/ceiling, or ensure the chosen device and the specific LED load are compatible and stable.
“What’s the safest path if the wall box has no neutral?” The safest path avoids inventing a neutral: keep the wall switch simple and put the sensing where neutrals exist (fixture/ceiling), or rewire properly during a remodel. The unsafe path is trying to force a wall device to work by using ground as neutral or borrowing neutrals across circuits.
This guide intentionally does not teach meter testing or circuit mapping step-by-step. That work is where older homes get dangerous fast—especially with mixed circuits, shared neutrals, and crowded metal boxes. The practical boundary is simple: verify the box, read the Rayzeek installation sheet for the specific device in hand, and if the wiring reality and the spec don’t match, change the architecture or hire a licensed electrician to make the wiring match the requirement.
Stable motion lighting is achievable in old houses. The way to get it isn’t cleverness—it’s choosing the correct wiring reality and refusing the hacks that make “simple upgrades” turn into expensive repairs.


