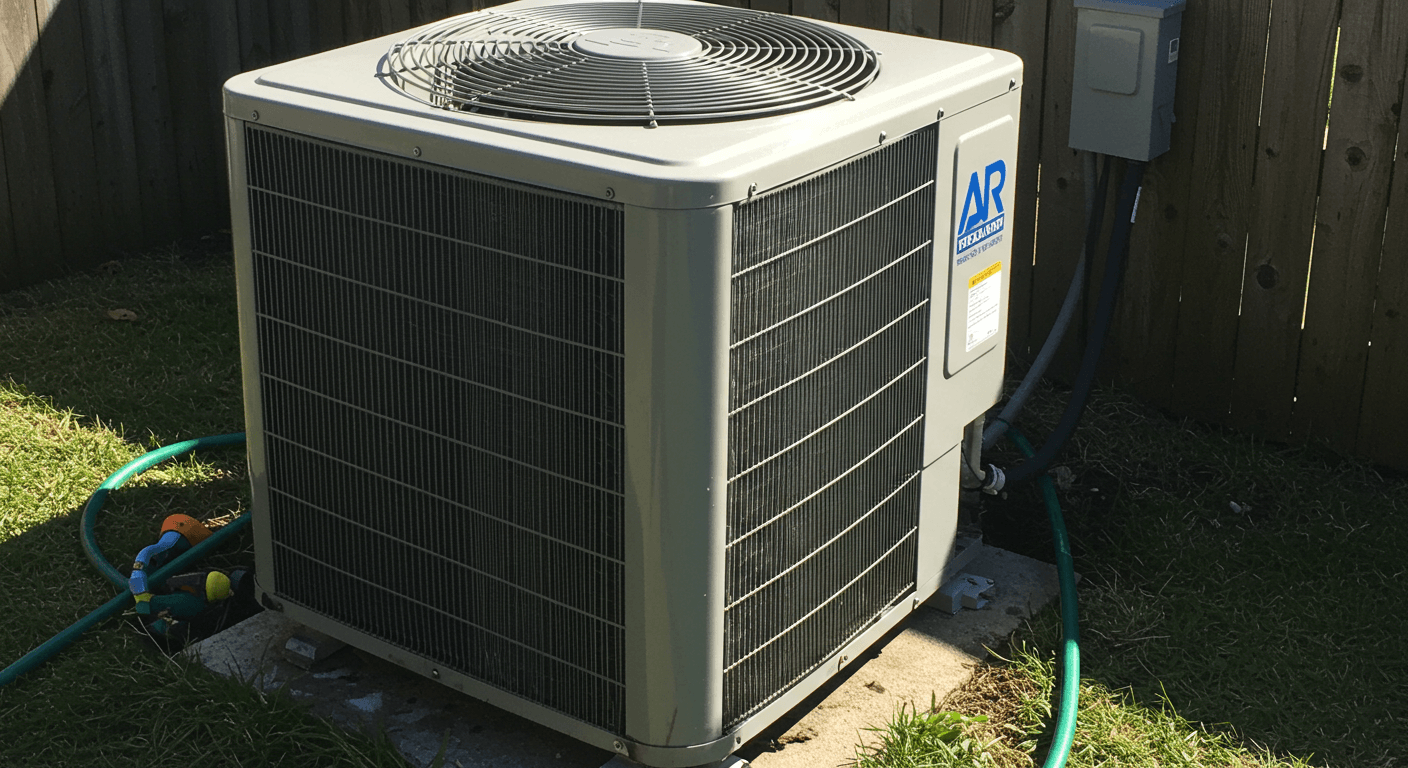
Is your AC unit working overtime but still not keeping you cool? It’s a frustrating situation, especially when the summer heat is on! If you’re experiencing this, you’re definitely not alone. Many homeowners find themselves in the same boat, often leading to higher energy bills and a less-than-comfortable home. But what if the solution was simpler than you think? Often, the problem isn’t a major breakdown, but a simple task that’s easy to overlook: cleaning your outside AC unit. You probably remember to change your indoor air filters, but the outdoor unit, constantly exposed to the elements, often gets forgotten.
This guide is all about cleaning the outside part of your AC unit. It’s a surprisingly simple task, but it can really make a difference! By cleaning it, you’ll boost your AC’s efficiency, which means lower energy bills and a cooler, more comfortable home. Now, before we dive into the cleaning steps, let’s talk safety. It’s super important to do this right, so we’ll start with some essential safety tips.
This guide will walk you through the entire cleaning process, step by step. We’ll cover everything from gathering your tools to actually cleaning the unit. Plus, we’ll help you decide when it’s best to call in a pro. By following these steps, you’ll not only save money but also extend the life of your AC unit, avoiding expensive repairs down the road. Think of it as preventative maintenance, like changing the oil in your car – a little effort now can save you a lot of trouble later!
Why You Should Clean Your AC
So, now that you know why cleaning your outdoor AC unit is important, let’s talk about the specific benefits. Why does it really matter? Well, one of the biggest advantages is that it boosts your AC’s efficiency. Plain and simple: a clean AC unit just works better.
A clean AC unit is way more efficient than a dirty one. Why? Because dirty coils act like insulation, which messes with the heat transfer process. The refrigerant inside your AC coils absorbs heat from your home, and then it needs to release that heat outside. Think of the refrigerant like a sponge soaking up water – it’s soaking up heat. But when dirt and debris build up on the coils, it restricts airflow and makes it harder for the heat to escape. This buildup acts like a blanket, trapping the heat and making your AC work much harder. In fact, a clean AC can be up to 30% more efficient! That’s a huge difference in how much energy it uses to cool your home. This loss of efficiency is sometimes measured by something called the “fouling factor,” which basically tells you how much the dirt and debris are reducing the heat transfer. The higher the fouling factor, the less efficient your AC is.
This boost in efficiency directly leads to lower energy bills. When your AC isn’t struggling to cool your home, it uses less energy. And that means you’ll see noticeable savings on your monthly utility bill. It’s like getting a discount on your cooling costs, just for keeping your unit clean!
And that’s not all! Regular cleaning can also extend the lifespan of your AC unit. By preventing dirt and debris from building up, you reduce the strain on important parts like the compressor, which is a critical (and expensive!) component. The compressor is like the heart of your AC system, and keeping it healthy is key to keeping the whole thing running. This prevents premature wear and tear, allowing your unit to operate efficiently for longer. It’s like taking care of your car’s engine – regular maintenance keeps it running smoothly for years to come.
This preventative maintenance can also help you avoid some pretty hefty repair bills. A dirty AC unit forces the compressor to work much harder, which increases the risk of it overheating and eventually failing. And trust me, a compressor failure is one of the most expensive AC repairs you can face. Dirty coils can also increase the pressure of the refrigerant, which puts even more stress on the compressor. This added pressure can lead to leaks and other problems.
The coils and fins are especially vulnerable to dirt and debris. These are the parts that are working hard to exchange heat. Different types of debris, like pollen, leaves, and dust, can have different effects. Pollen, for example, tends to clog coils more than leaves, so you might need to clean more often if you have a lot of pollen in the air. Think of pollen as a sticky film that coats the coils, while leaves are larger obstructions that block airflow. Even seemingly minor inefficiencies caused by a dirty AC unit can add up over time, costing you a significant amount of money. It’s like running an extra appliance all the time, or a slow leak in your wallet – it adds up! So, to sum it up, cleaning your outdoor AC unit is a simple but powerful way to save money, extend the life of your system, and make sure it’s running at its best. It’s a win-win-win!
Safety First
Before you even think about cleaning your AC unit, it’s absolutely crucial to put safety first. Working with electrical equipment and machinery always involves some risks, and taking the following precautions isn’t just a good idea – it’s essential for your well-being.
Here’s a list of safety precautions to take before you start cleaning:
- Disconnect the power supply: Turn off the circuit breaker that controls your AC unit at the electrical panel. Look for the breaker labeled “AC” or “Air Conditioner.” Don’t just rely on the thermostat, because that doesn’t completely cut off the power. This prevents the risk of electric shock. Even if the AC seems off, there can still be live electricity running to the outdoor unit.
- Wear appropriate protective gear: This means sturdy work gloves to protect your hands from sharp edges and debris, and ANSI-approved safety glasses to shield your eyes from flying particles. The fins on the AC unit can be surprisingly sharp, and you definitely don’t want any dust or debris getting into your eyes.
- Clear the area around the unit: Remove any plants, debris, or anything else that’s within 2-3 feet around and above the unit. This gives you plenty of room to work and prevents anything from getting in the way or getting caught in the fan. You need room to move around and avoid accidentally damaging the unit or your landscaping.
- Allow the unit to cool down completely: If the AC has been running recently, wait at least 30 minutes before you start cleaning. This prevents burns from hot parts. The refrigerant lines and other parts can get very hot when the AC is running.
- Inspect the unit for visible damage: Before you start, look for any signs of damage, like frayed wires, loose panels, or unusual leaks. If you see anything that concerns you, don’t proceed. Contact a qualified professional instead. It’s always better to be safe than sorry, and a pro can diagnose and fix any underlying problems.
- Be aware of the capacitor: The capacitor is a part that stores electrical energy, even when the power is off. It looks like a large battery. Avoid touching it directly. If you’re not sure how to handle the capacitor, it’s best to leave it to a professional. It can deliver a powerful shock, even when the power is disconnected.
- Ensure proper grounding: Check the grounding wire connection to make sure it’s secure. Proper grounding helps prevent electrical shock. The grounding wire provides a safe path for electricity to flow in case of a fault.
By carefully following these safety precautions, you can minimize the risks involved in cleaning your AC unit and make sure the process is safe and successful. Always remember: safety comes first!
Tools and Supplies
Before you start cleaning, it’s important to gather all the tools and supplies you’ll need. Having everything ready to go will make the job much easier and more efficient. It’s like getting all your ingredients together before you start cooking – it just makes the whole process smoother!
Here’s what you’ll need to clean your AC unit:
- Garden hose with a spray nozzle: Use a regular garden hose with an adjustable spray nozzle. Don’t use a pressure washer, because the high-pressure stream can damage the delicate fins. The hose will be used to rinse the coils. Think of it as giving your AC unit a gentle shower, not a power wash.
- Fin comb: This special tool is used to straighten any bent fins. It’s important to choose a fin comb that matches the fin spacing of your AC unit. Fin combs come in different sizes, measured in fins per inch (FPI). It’s like having the right size wrench for a bolt – you need the right tool for the job.
- Coil cleaner: Use a cleaner that’s specifically designed for AC units. Foaming, biodegradable options are best. Look for products with the EPA Safer Choice label, which means they meet stricter chemical standards. The cleaner will help dissolve dirt and grime on the coils. It’s like using a special soap to cut through grease and dirt. Alkaline cleaners are typically used for outdoor coils and often contain sodium hydroxide or potassium hydroxide. These chemicals help break down organic matter like dirt and pollen. Acidic cleaners are sometimes used for indoor coils, but they should be handled with extreme caution because they can be corrosive. Always follow the manufacturer’s instructions and safety precautions when using any coil cleaner.
- Soft-bristled brush: Use a soft-bristled brush to remove loose debris from the unit. This helps prevent the debris from being pushed further into the coils when you rinse them. Think of it as gently sweeping away dust before you mop.
- Shop vacuum (optional): A shop vacuum can be helpful for removing leaves, twigs, and other debris from the unit. It’s like using a vacuum cleaner to pick up larger pieces of dirt.
- Environmental considerations: Choose biodegradable, EPA Safer Choice certified cleaners to minimize your impact on the environment. These cleaners have lower VOCs (volatile organic compounds) and are less harmful. VOCs are chemicals that can evaporate into the air and cause pollution. These cleaners are designed to break down naturally, which reduces their impact on the ecosystem.
With all your tools and supplies ready, you’re now ready to start cleaning! Let’s get to it!
Looking For Motion-Activated Energy-Saving Solutions?
Contact us for complete PIR motion sensors, motion-activated energy-saving products, motion sensor switches, and Occupancy/Vacancy commercial solutions.
Cleaning Your AC Unit
Okay, you’ve got your tools and supplies, and you’ve taken all the necessary safety precautions. Now you’re ready to start cleaning your AC unit! It’s important to follow these steps in order to get the best results and avoid damaging the unit. Think of it like following a recipe – each step is important for the final outcome.
The cleaning process can be broken down into a few key steps. First, you’ll need to remove any debris from the outside of the unit (we’ll talk more about this in the “Removing Debris” section). This is like clearing the area before you start working. Next, you’ll carefully straighten any bent fins using a fin comb (check out the “Fin Care” section for details). This is like restoring the shape of the fins so they can do their job properly. After that, you’ll apply a coil cleaner and rinse the coils thoroughly (we’ll cover this in “How to Clean the Coils”). This is the main cleaning step, where you remove all the built-up dirt and grime. Finally, you’ll put back any parts you removed and run the AC for a little bit to make sure everything is working correctly. This is like a final check to make sure everything is back in place and functioning as it should.
Did you know there are different types of AC coils? Knowing what kind you have can help you choose the right cleaning method. For example, spine fin coils are delicate and need a very soft brush. These coils have thin, tightly spaced fins. Microchannel coils are a bit tougher, but you should still avoid using harsh chemicals on them. These coils have small, parallel channels instead of fins.
The whole cleaning process will probably take you about 1-2 hours, depending on how dirty your unit is and how much experience you have. It might be tempting to use whatever tools you have on hand, but it’s really best to use a fin comb and a coil cleaner that are specifically made for AC units. Using the right tools will make the job easier and help you avoid making costly mistakes. By following these steps carefully, you can make sure your AC unit gets a thorough cleaning and runs at its best.
Removing Debris
Okay, the very first step in cleaning your AC unit is to remove any debris that’s built up on it. This helps make sure the air flows properly and prevents the debris from getting in the way of the cleaning process. It’s like clearing your workspace before you start a project. And remember to be gentle during this step, because you don’t want to damage those delicate fins!
Here are the steps for removing debris:
- Gently brush away loose debris: Use a soft-bristled brush to carefully remove leaves, twigs, dirt, and other loose debris from the outside of the unit, including the top and sides. This prevents the debris from being pushed further into the coils when you rinse them. If it’s a dry day, you can lightly dampen the brush to reduce static electricity. This will help the debris cling to the brush instead of flying around.
- Vacuum out remaining debris (optional): If you have a shop vacuum, use it to remove any remaining debris from the unit, including the spaces between the fins. This helps make sure you get a more thorough cleaning. A shop vacuum can reach into tighter spaces than a brush.
- Inspect the fan blades: Carefully remove any debris that’s stuck to the fan blades. This makes sure the fan can operate properly and prevents damage. The fan needs to be able to spin freely to move air efficiently.
- Clear the base of the unit: Remove any debris that’s built up at the bottom of the unit. This allows for proper drainage and prevents water from building up. Water buildup can lead to corrosion and other problems.
- Avoid using a leaf blower: Leaf blowers aren’t a good idea, because they can blow debris into the unit, which makes the cleaning process harder. You want to remove debris, not push it further in!
- Focus on the exterior and easily accessible areas: Don’t try to take the unit apart. Cleaning should be limited to the outside and areas you can easily reach. Taking the unit apart can be dangerous and might void your warranty.
Once you’ve removed all the debris you can see, you can move on to the next step: taking care of the fins. Let’s get those fins straightened out!
Fin Care
After you’ve removed the debris, the next step is to carefully check the fins and straighten any that are bent. The fins are really important for airflow, and bent fins can seriously reduce how well your AC unit works. Think of the fins like the gills of a fish – they need to be open and unobstructed to work properly. The fins are usually made of aluminum, which is pretty delicate, so it’s important to handle them with care. They can be easily bent or damaged if you’re not careful.
Here’s how to take care of the fins:
- Choose the correct fin comb: Before you start, pick a fin comb that matches the fin spacing of your AC unit. This is measured in fins per inch (FPI). Using the wrong size fin comb can damage the fins. It’s like using the right size screwdriver for a screw – you need the right tool for the job.
- Carefully straighten bent fins: Gently insert the fin comb into the bent fins and use a slow, pulling motion to straighten them. Work slowly and don’t use too much pressure, because you can easily damage the delicate fins. Think of it like combing tangled hair – you need to be gentle to avoid breaking it.
- Ensure proper airflow: The goal is to get the fins back to their original, upright position so air can flow properly. Straight fins allow air to flow freely through the coils, which maximizes heat transfer. It’s like opening the blinds on a window to let in more light.
- Address broken fins: A few broken fins aren’t usually a big deal. But if a lot of fins are broken or badly damaged, it’s best to talk to a professional. A few broken fins are like a few missing teeth – it won’t affect things too much, but a lot of missing teeth will cause problems.
- Fin Material: Most fins are made out of aluminum. Aluminum is lightweight and conducts heat well. Sometimes they’re made of copper, which is a little stronger. Copper also conducts heat well, but it’s heavier and costs more than aluminum.
With the fins straightened out, you’re ready to move on to the next step: cleaning the coils. Now it’s time to get to the heart of the matter!
Get Inspired by Rayzeek Motion Sensor Portfolios.
Doesn't find what you want? Don't worry. There are always alternate ways to solve your problems. Maybe one of our portfolios can help.
How to Clean the Coils
Now that you’ve removed the debris and straightened the fins, you can clean the coils to get rid of any remaining dirt, grime, and other stuff. It’s super important to follow the manufacturer’s instructions for the coil cleaner you’re using, because different cleaners might have different ways you need to apply them and different soaking times. This is like following a recipe – you need to follow the instructions to get the best results.
Here are the steps for cleaning the coils:
- Carefully read and follow the manufacturer’s instructions: Before you put on the cleaner, read and understand the instructions on the product label. This will make sure you use the cleaner correctly and don’t damage the coils. Different cleaners have different chemical makeups and need to be handled differently.
- Apply the coil cleaner evenly: Coat the outside coils with the cleaner, making sure you cover all the surfaces. Be careful not to use too much, because that can waste cleaner and maybe damage other parts of the unit. You want to coat the coils, not drown them.
- Let the cleaner soak for the recommended time: The amount of time you need to let the cleaner soak will depend on the cleaner you’re using, so check the manufacturer’s instructions. This lets the cleaner get in there and loosen the dirt and grime. Think of it like letting a stain remover soak into a fabric before you wash it.
- Rinse the coils thoroughly with a gentle stream of water: Use your garden hose with the spray nozzle set to a gentle setting. Rinse until the water runs completely clear, making sure you get rid of all the cleaner. Any cleaner that’s left behind can attract dirt, which will block airflow and make your AC less efficient. It’s like rinsing shampoo out of your hair. You need to rinse until all the soap is gone.
- Rinse from the inside out, if possible: If you can get to the inside of the unit, rinsing from the inside out can help keep you from bending the fins. This helps flush out debris more effectively. It’s like cleaning a window from the inside out – you can see where the dirt is more easily.
- For heavy grime or corrosion: If the coils are really dirty, you might need to clean them more than once, using longer soaking times. But if you see a lot of corrosion, it’s best to talk to a professional. Heavy corrosion can weaken the coils and cause leaks.
Once you’ve rinsed the coils really well and the water is running clear, you can put the unit back together and run it for a bit to test it out. Almost done! Just a few more steps.
How Often to Clean Your AC
Now that you know how to clean your AC unit, you’re probably wondering how often you need to do it. A good rule of thumb is to clean your outdoor AC unit at least twice a year: once at the start of the cooling season and once at the end. Think of it like spring and fall cleaning for your AC unit.
Maybe You Are Interested In

- Ceiling-mounted PIR occupancy sensor with dry-contact relay output
- 12/24VDC or 12/24VAC low-voltage supply
- COM, NO, and NC isolated relay contacts for EMS, HVAC, and building control inputs
- Low-voltage DC recessed ceiling-mounted microwave motion sensor switch
- 12 VDC / 24 VDC input with 10-30 VDC range
- 10A max work current with adjustable time delay, Lux threshold, and sensitivity
- Higher-load recessed ceiling-mounted microwave motion sensor switch
- 100-265 VAC line-voltage input, 10A model
- 5.8 GHz microwave sensing with adjustable time delay, Lux threshold, and sensitivity
- Recessed ceiling-mounted microwave motion sensor switch
- 100-265 VAC line-voltage input, 5A model
- 5.8 GHz microwave sensing with adjustable time delay, Lux threshold, and sensitivity
- Ceiling-mounted RZ037 PIR occupancy sensor dimmer for 220V power
- 3A maximum working current with 660W rated load
- LUX button controls light-sensor ON/OFF and user-set dimming brightness
- Ceiling-mounted RZ037 PIR occupancy sensor dimmer for 110V power
- 3A maximum working current with 330W rated load
- LUX button controls light-sensor ON/OFF and user-set dimming brightness
- Low-voltage DC ceiling-mounted microwave motion sensor switch
- 12 VDC / 24 VDC input with 10-30 VDC range
- 10A max work current with adjustable time delay, Lux threshold, and sensitivity
- Higher-load ceiling-mounted microwave motion sensor switch
- 100-265 VAC line-voltage input, 10A model
- 5.8 GHz microwave sensing with adjustable time delay, Lux threshold, and sensitivity
- Ceiling-mounted microwave motion sensor switch
- 100-265 VAC line-voltage input, 5A model
- 5.8 GHz microwave sensing with adjustable time delay, Lux threshold, and sensitivity
- Low-voltage DC recessed ceiling mount PIR motion sensor switch
- 12 VDC / 24 VDC input with 10-30 VDC range
- Max work current 10A with adjustable time delay, Lux threshold, and sensitivity
- Higher-load recessed ceiling mount PIR motion sensor switch
- 100-265 VAC line-voltage input, 10A model
- 360-degree detection with adjustable time delay, Lux threshold, and sensitivity
- Recessed ceiling mount PIR motion sensor switch
- 100-265 VAC line-voltage input, 5A model
- 360-degree detection with adjustable time delay, Lux threshold, and sensitivity
- Wireless switch and receiver kit for indoor ON/OFF lighting control
- 100-230VAC, 50/60Hz receiver with 5A rated current
- CR2032-powered wireless switch with 2.4GHz communication
- Occupancy (Auto-ON/Auto-OFF)
- 12–24V DC (10–30VDC), up to 10A
- 360° coverage, 8–12 m diameter
- Time delay 15 s–30 min
- Light sensor Off/15/25/35 Lux
- High/Low sensitivity
- Auto-ON/Auto-OFF occupancy mode
- 100–265V AC, 10A (neutral required)
- 360° coverage; 8–12 m detection diameter
- Time delay 15 s–30 min; Lux OFF/15/25/35; Sensitivity High/Low
- Auto-ON/Auto-OFF occupancy mode
- 100–265V AC, 5A (neutral required)
- 360° coverage; 8–12 m detection diameter
- Time delay 15 s–30 min; Lux OFF/15/25/35; Sensitivity High/Low

- 100V-230VAC
- Transmission Distance: up to 20m
- Wireless motion sensor
- Hardwired control

- Voltage: 2x AAA Batteries / 5V DC (Micro USB)
- Day/Night Mode
- Time delay: 15min, 30min, 1h(default), 2h

- EU plug power adapter

- UK plug power adapter
But, how often you really need to clean your unit can depend on a few things. If you live in an area with a lot of dust, pollen, or trees, you’ll probably need to clean it more often. More stuff in the air means more stuff building up on your AC unit. Being close to busy roads, construction sites, or the ocean can also mean more debris building up on your unit. These places tend to have more pollutants and small particles in the air.
How much you use your AC unit also matters. If you run your AC a lot during the cooling season, you’ll need to clean it more often than someone who only uses it now and then. More use means more wear and tear, and more chances for dirt and debris to build up.
Besides cleaning it twice a year, it’s a good idea to do a quick visual check every month. Look for any debris buildup you can see, if the airflow seems weaker than usual, or if it doesn’t seem to be cooling as well. These are all signs that your unit might need a cleaning. It’s like checking the oil level in your car – a quick look can tell you if there’s a problem.
Instead of thinking of AC cleaning as just another chore you have to do each season, think of it as preventative maintenance, like changing your car’s oil. It directly affects how “healthy” your system is and how much it costs you in the long run. It’s an investment in how long your AC unit lasts and how well it works. If you really want to get technical, you can use an anemometer to measure the airflow across the coil and compare it to what the manufacturer says it should be. An anemometer is a device that measures wind speed, and in this case, it can measure how much air is flowing through your AC unit. You can also measure the temperature difference between the air going into the coil and the air coming out. If the difference is smaller than it used to be, it means your AC unit isn’t cooling the air as well as it should. By cleaning your AC unit regularly, you can make sure it runs efficiently and effectively for years to come. It’s a small thing that can save you money and headaches down the road.
Types of AC Units
While this guide is mostly about cleaning split-system AC units, it’s helpful to know about the different types of AC units out there. The basic cleaning ideas are pretty much the same, but there might be small differences in how easy they are to get to and how you do it. It’s like knowing the different types of cars – they all have engines and wheels, but they might have different features and need different maintenance.
Here are the different types of AC units:
- Split system: This is the most common type of AC unit. It has an outdoor part (the condenser) and an indoor part (the air handler). The cleaning steps in this guide are mostly for split systems. This is the kind of AC unit that most homes have.
- Packaged unit: All the parts (compressor, condenser, evaporator) are in one outdoor unit. To clean it, you might need to take off some panels to get to the coils. You often see these units in commercial buildings or older homes.
- Ductless mini-split: These systems have an outdoor unit and one or more indoor units that are mounted on the wall. Cleaning the outdoor unit is similar to cleaning a split system, but the indoor units need their filters and coils cleaned separately. These units are becoming more popular because they’re energy efficient and flexible.
- Window unit: These units have everything in one box and are installed in a window. Cleaning them is similar to cleaning other types, but you often need to take the unit out of the window to make it easier to get to. These are a common choice for smaller spaces or apartments.
- Heat pump: Heat pumps are like AC units, but they can also provide heat. You should clean them during both the cooling and heating seasons. The reversing valve, which is what lets the heat pump switch between cooling and heating, should really be cleaned by a professional.
- Geothermal heat pump: These systems use the earth’s temperature to heat and cool. Geothermal heat pumps are designed differently and need special cleaning. You should talk to the manufacturer or a professional about how to clean them. These systems are very energy efficient, but you need special knowledge to take care of them.
Knowing what kind of AC unit you have can help you adjust the cleaning steps to fit. Now, let’s talk about when it’s best to call a professional for help. Knowing your AC type is the first step!
When to Call a Professional
While cleaning your outdoor AC unit is something most homeowners can handle, there are times when it’s really important to call a qualified professional. Trying to fix complex problems yourself can be dangerous and could damage your unit even more. It’s like trying to fix a serious electrical problem yourself – it’s best to leave it to the experts.
Here are some situations where you should definitely call a professional:
- Refrigerant leaks: If you see oily stuff around the unit, hear hissing sounds, or notice that it’s not cooling as well as it used to, you might have a refrigerant leak. Refrigerant is toxic and can be harmful if you breathe it in or get it on your skin. A licensed professional should always handle refrigerant leaks.
- Electrical problems: Burning smells, tripped breakers, or damaged wires are all signs of electrical problems. Working with electricity is extremely dangerous and should only be done by a qualified electrician. Never try to fix electrical problems yourself.
- Internal component issues: Problems with the compressor, capacitor, or other parts inside the unit need special knowledge and tools. Trying to fix these parts yourself can be dangerous and might void your warranty. These parts are complicated and need someone with special training to repair them.
- If you’re uncomfortable with any step of the cleaning process: If you’re not sure about any part of the cleaning process, it’s always best to be cautious and call a professional. Your safety and the well-being of your AC unit are the most important things.
- No improvement after cleaning: If you’ve cleaned your unit really well and it’s still not working right, there might be a more serious problem that needs a professional to look at it. A professional can figure out what’s wrong and fix it.
- Significant physical damage: If your unit has been damaged, like from a storm or something falling on it, it’s best to have it checked out and repaired by a professional. Major damage can make the unit unsafe and not work properly.
- Unusual noises: Clicking, grinding, or humming sounds that aren’t normal for your unit could mean you need professional help. These noises can mean there’s a problem with the fan, compressor, or other parts.
Putting safety first and knowing when to get help from a professional are key to taking care of your AC unit and making sure it lasts a long time. Knowing your limits is just as important as knowing how to clean your AC unit.